Tuesday, April 25, 2017

How To Lose Weight With Hashimoto’s

How To Lose Weight With Hashimoto’s

My Top 5 Helpful Weight Strategies For Hashimoto’s

Weight gain and the inability to lose weight may be a devastating consequence for many with hypothyroidism.
Many of you have been asking how to lose weight with Hashimoto’s and hypothyroidism…
Here are some helpful strategies for weight management and Hashimoto’s:
1. Get Your Latest Lab Values
Get your latest lab values for TSH, Free T3 and Free T4 from your doctor. You may have been told that these numbers were “normal”, but sometimes when these numbers are on the outskirts of normal, your metabolic rate may still be impaired making it more difficult for you to burn calories.
Additionally, new guidelines have redefined the normal range for TSH to be below 3, however, not many labs have implemented this guideline. Your doctor may be using old ranges.
Most people report feeling well with a TSH between 0.5-2. 0. Remember, thyroid medications are dosed in micrograms, (that is 1/1000 of a milligram), sometimes a teensy increase in the dose can make a world of a difference. Talk to your doctor.
2. Consider The Type of Medication You Are Taking
Some report more weight loss with T4/T3 combinations (Armour, Nature-Throid, compounded medications) versus T4 medications (Synthroid, Levoxyl, Tirosint) alone. T4 is a precursor to T3, but some individuals do not convert T4 to T3 properly, and the T3 component is the metabolically active one. For more information, make sure to read my article on which thyroid medications are best and my top 11 thyroid medication tips.
3. Consider the Type of Diet You Are Eating

Tuesday, April 18, 2017

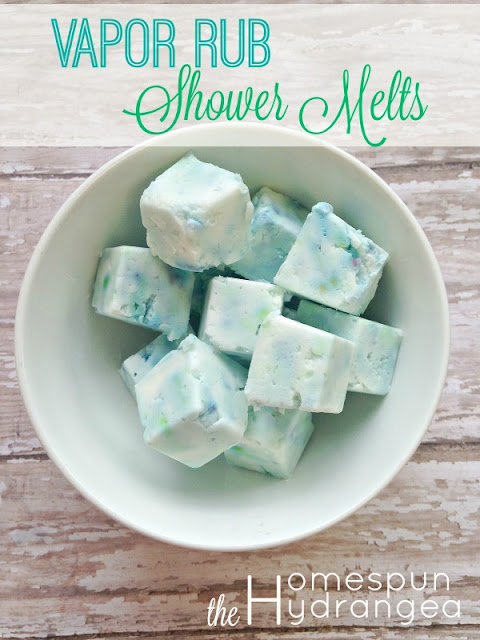
DIY Vapor Rub Shower Melts


I am so in love with vapor rub. You may remember my post 10 Uses for Vapor Rub, or 5 Chest Rub Hacks for Babies, and this Vapor Rub Scented Candle. And if those aren’t enough to convince you I am back with more! One of the littles was sick this week and just as stuffy as could be. Insert sad face here. After she was pretty sure I was the Wicked Witch for making her take medicine (side note…Hey pharmaceutical companies, it’s the year 2015. Medicine should be tasting like bacon now. Stop making it taste like rancid fruit juice.) I made her a peace offering of these homemade vapor rub shower cubes.
Now before you go thinking I Betty Homemaker, think again. These are so stinking easy to make, and you can whip them up in about 20 minutes. The end result is a vapor rub infused bath cube that you can place in the shower for instant relief from nasal congestion. Want to make your own? Let’s get started!
Here is what you will need to make your own Vapor Rub Shower Cubes:
Ice cube tray 

3 tablespoons of vapor rub (Maty’s makes a petroleum free, all natural variety with eucalyptus, peppermint, and wintergreen found here for around $5. It is amazing, it is safe for use with children, and I highly suggest it!)

1 cup of corn starch
2 tablespoons of water
Mixing bowl
Blue and green food coloring (optional)

Once you have your supplies, you are ready to roll. As you can see, chances are you already have these items in your home. Oh and when you are done with this recipe, check out my recipes for Vaporizing Bath Bombs and Vaporizing Bath Soak too!

Tuesday, April 11, 2017

The 5 Biggest Mistakes You Make When Painting Furniture


Improve a less-than-stellar piece with paint, patience, and my tricks. I had the oops moments; now you can learn from them.

There's no shortage of tutorials about painting furniture online. And I've used a lot of them to paint dressers, console tables, chairs, mirrors, and more. But I have found problems/issues with a lot of the tutorials—paint chips, finishes aren't smooth, and paint peels. I have had to redo several furnishings, so I decided to compile all the mistakes I've made to help you give your furnishings a makeover that will last.
Here's how to paint a piece of furniture—without making a major mistake:
1. Sand it. There are lots of tutorials out there that claim you don't need to sand. There are also lots of primers and paints promising no sanding necessary. From what I have learned, sanding is a must. Sand all surfaces with 150-grit sandpaper. (I use this orbital sander with variable speeds.) Be careful not to gouge the surface. You're just looking to rough it up a little so the primer has something to adhere to; you're not trying to strip the surface. Use 80-grit if you are sanding a furnishing with an existing varnish.
2. Remove residue. Wipe down the surface with a tack cloth to remove any residue. Do not use a paper towel. Don't speculate on whether something is a lint-free cloth. Just use the tack cloth.


Related Posts Plugin for WordPress, Blogger...